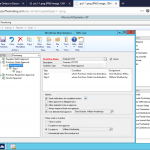
1. Open Workflow Maintenance window by clicking on (Administration>Setup>Company>Workflow>Workflow Maintenance)
2. On the Workflow Maintenance window, choose the type of workflow you want create. Choose the series, then type of workflow in the tree view. Each workflow created is based on a type. The type of workflow indicates the ideal purpose of the workflow. Once you have selected the workflow type you want to create, define the workflow properties. You must select at least one manager before activating the type of workflow selected.
3. Click on the Manager Lookup button in order to open the Workflow User Selection window. This will add managers to your workflow type.
4. Select New Workflow, then name the workflow using a unique name. It’s recommended that you include your company name and the workflow document type in the name. Click on the Copy button in order to copy an existing workflow from one company to another.
5. Specify whether notifications must be sent for all completed actions. With Microsoft Dynamics GP workflow, you can send notifications to users when their submitted documents have been acted on in the workflow approval process. Check mark the “Send notifications for completed actions” option in the Workflow Maintenance window. Open the “Workflow Email Notification Maintenance” window from the expansion button.
6. Specify whether the approvers can delegate tasks in the workflow. If you want your approvers to delegate tasks to other approvers in the workflow, check the “Allow approver to manually delegate tasks” option.
7. Specify whether the document originator should be an approver in the workflow. Most users who create documents such as a purchase order can submit it for approval. Therefore, you can indicate in the workflow that the originator can be an approver.
8. Specify if the documents must be approved by at least one approver.
9. Specify a substitute final approver in the workflow. The final approver is the last person within the approval path who must approve the document. Check the “Use alternate final approver” option, then enter the alternate final approver’s name if you need a different escalation approver. The alternate final approver in the workflow is assigned the approval duty under the following conditions:
- The “Always Require at Least One Approver” option is check-marked and there is no other approval stages whose conditions are met in the workflow.
- The “Always Require at Least One Approver” option is check-marked and approver edits the document, while there is no other following approval steps in the workflow.
- No other approval steps exist following a pending step, depending on the escalation settings
10. What happens if a task is overdue? In case, an approver fails to approve a task by the set due date, then the task is considered escalated or overdue. You need to specify what should happen to any overdue task on the workflow by choosing one of the options below:
- Take no action- Choose this option if you don’t want the pending task assigned to the current approver in the workflow.
- Escalate to the next approver- Choose this option in case you want the system to assign the pending task to the next approver within the workflow automatically.
- Escalate to- Choose this option if you need the system to assign the pending task to a specific person automatically. You must provide the name of the person you want the task escalated to.
- Automatically reject the overdue- Choose this option if you want the system to reject the pending task automatically.
Finally, click on “Save Workflow” option to save your workflow settings.


