In our last few entries, we have been taking a look at what it is like to use the Accounts Receivable module for Microsoft Dynamics SL, covering all of the following:
- Entering and previewing an invoice
- Entering and applying a payment
- Using the various process screens to automatically apply payments or to make adjustments
- Using the inquiry functionality for the Accounts Receivable module
- Reporting for Accounts Receivable
Today we’re going to take a look at what it is like to use the Quick Query tool for the Accounts Receivable module in Microsoft Dynamics SL.
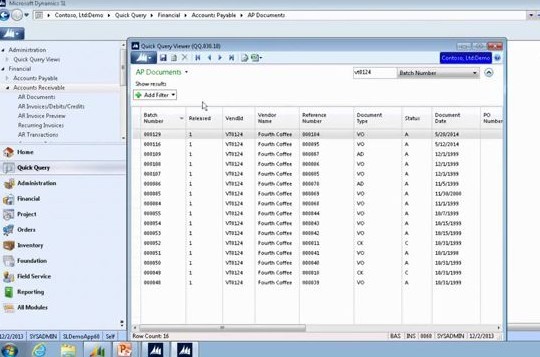
Quick Query is a tool that is similar to reports. It enables you to quickly query the Microsoft Dynamics SL database for specific information, and you can add filters, sort, and add or remove columns on the fly. You can then export the resulting data to Excel. But if you’re just looking for answers to questions, Quick Query is a great tool for getting those answers, because you can quickly view the information you need, and you can right click on a field to drill back to an originating transaction.
For Accounts Receivable, Quick Query enables you to quickly and easily view information such as customer balances or customer history. To access the Quick Query tool, you can simply click the Quick Query button in the left pane. Then select the module/data you want to query. For example, you can select “Customer Balances” under the Accounts Receivable heading, and the Quick Query Viewer will open with a list of all customer balances. At the top of the screen, you can easily filter down to the transactions you want to look at by Customer ID. Click on the expand button next to the Customer ID button, and you’ll be able to add as many filters as you want by clicking the Add Filter button for each one.
To move a column, simply click on the column heading and drag it where you want it. To remove a column, just right-click on the column heading and select the option to remove it. You can add columns and fields as well. When you have the data as you like it, you can export it to Excel with the click of a button at the top of the screen.


